Character & Prop Designs
Copyright © Mario Donk,
Artwork, concept and intellectual content are the property of the Author Mario Donk

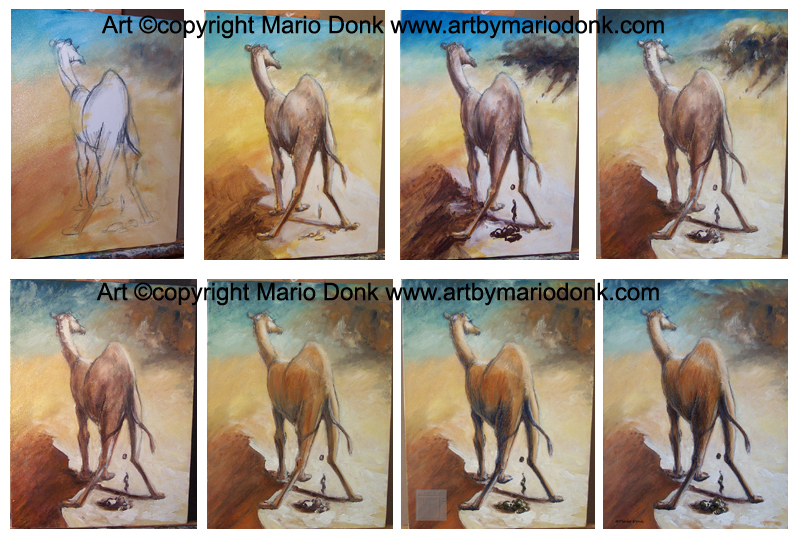
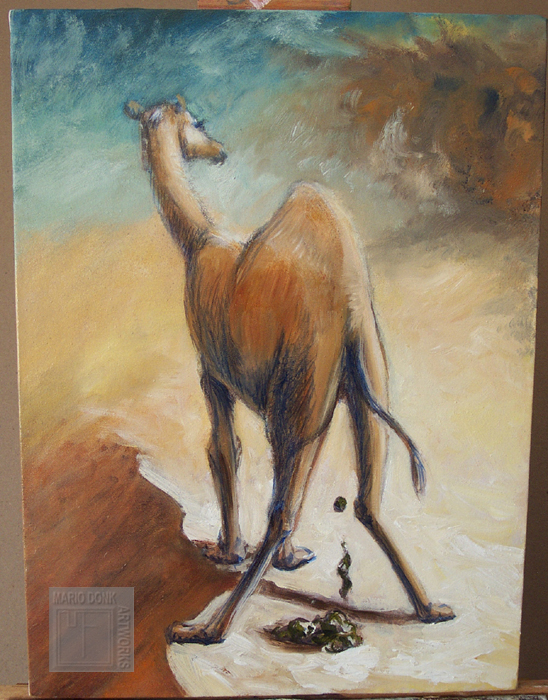
Stage 1
Please note, these tutorials are progress shots of an actual work in progress. They were not painted with the intention of being a demo, the idea of presenting them as demos or tutorials is purely because you may find it interesting. If they have value its because they are real, as in not created as demos or the usual garbage of repainting a painting in order to show steps, all of which are useless as its never how the work was created so it teaches you nothing and leads you up the creek without a paddle.
These works are different as its actual recording of the real work in progress, errors and all. I hope you find it useful.
Title: “Oh crap”
This is a humorous interpretation of the thoughts of a camel as it sees an approaching sand storm.
What else can one say? The image says it all. The drawing is in charcoal and I went straight into laying colour. Normally, I would under paint, but this is fairly basic so develops fine by going straight into it.
Come back and see how its progressing.
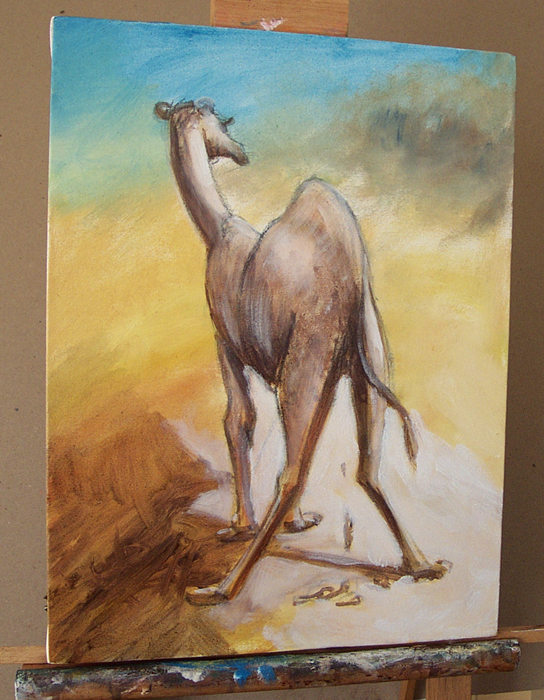
stage 2
Now, in hindsight it might have been better to do an under-painting first, but no harm done as there is hardly any paint down. I do an under-painting in brown, iron oxide, egg, sun-thickened linseed oil, damar and lots of water. It’s a right sticky mess that’s great to work with. Once set, it will never come off. Believe me; I’ve tried on a failed painting. When it dries it is there to stay, as long as the pyramids.
So for now, ignore that the nice colour is not so nice, we will put it back later. Now it’s ruthless modeling and getting the 3D look right.
It needs to set some, and then I can do more with white. I use oil white mixed with egg tempera and zinc oxide. The result is a lean mix as with all tempera painting. The oils come a day or two later, so this layer needs to be set enough so as not to move. You don’t want it to be wet when you start in with oil paint.
I have to be a little careful with the shadows as it’s going to be a high key painting. As it is in the desert in the full sun, shadows will get washed out with glare and reflection, but this gets fixed in the over painting.
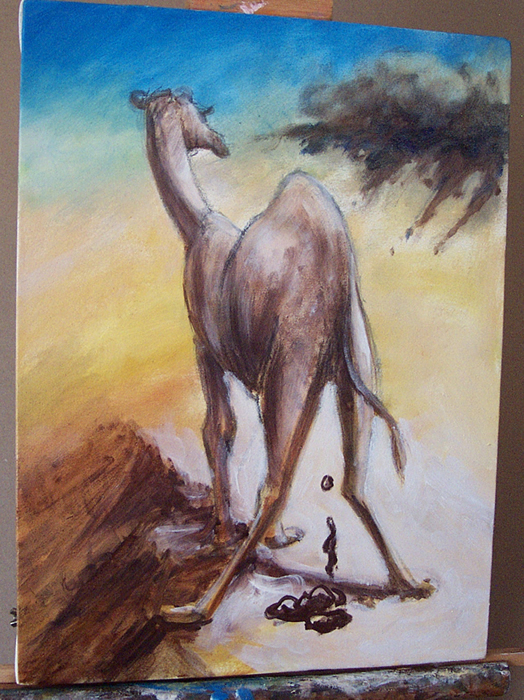
stage 3
More tonal work, largely with tempera and a little oil paint to add more shape and substance to the work. More dense dust storm. Right now it’s too dense but that’s intentional as the oil paint will lighten it considerably and push it back where it belongs. If I do it now it will be very wimpy once oil paint goes on.
So basically now it’s got to dry, then a separation layer, possibly very dilute damar with a tad of oil so as not to be too brittle, but so little oil as not to actually leave oily residue, as it will go brown. Use only the smallest part oil to keep it flexible, the idea being to seal the ground as it’s too absorbent for oil paint right now for what I have in mind.

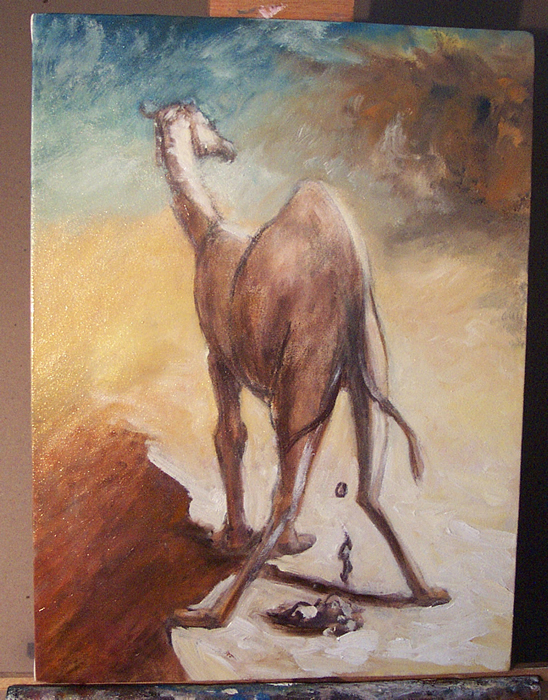
stage 4
I worked on the sand, a little in the sky, and some work to the dust storm which you can see in wip 5, is totally transformed. It needs to dry horizontally or it will all run. Still a lot more paint, damar and oil, to go. I am going to make a UV cupboard so I can speed the setting as, depending on the weather, this can take a while. Putting it outside in the sun is not an option.
stage 5
Now, we’re cooking with gas! It’s starting to get somewhere! Note the storm is very different now, exploding like some crazy thing across the sky. It will likely change again. Now we work on the camel. When the storm is dry it may get a glaze of dark blue in parts but we’ll see…perhaps a scumble would be better, however, if I did brown in that area in time it would not be a color problem.
The shade of the dune in the foreground also needs more complexity, and perhaps the illusion of being able to focus on something there.

stage 6
I added some paint to the camel and to the shadow in the bottom left. It now needs to set enough so that it doesn’t lift when I scumble over parts or actually dissolve under-layers, as the damar is a combination of damar and turps; you can easily scrub the under color away if you do it too soon.
This is the same with the sand storm; one could continue painting on it if body color was the intent, but as it’s a voluminous mass of dirt, solid color is not the total way to go. It needs some layering and there is entirely no point whatsoever in layering if the layers are solid color. It’s all got to hurry up and dry! As it is, most of the stages have been about an hour of work each and then put aside to set. One spends a great deal of time looking at it and thinking but actual paint time is short. However, short will not reflect in the price. The older I get, the quicker I get, but that’s a life of practice and I am not giving that up for free.
stage 7
Now for some modeling in the shadow areas on the body using a soft, round-pointed brush in dark blue. Note the cast shadow of the tail on the leg is strong but the self shadowing of the left leg is softer. Cast shadows always seem harder and sharper. Distance can make it otherwise
Right now I’ll leave it as is, then later come into the dark with a solid lighter body color. Note that I am making it easy for myself in that most of the shadows here will be in the dark side of the sand so there’s no need to work them out. The animal’s droppings may need a shadow but only if it won’t confuse the image. I do wonder if this particular technique would not have been easier and quicker in acrylic, as there is much waiting for layers to dry. I am not saying I’d put acrylic over oil, one should never do that, but I may try an acrylic painting next, painting it this way to see how it goes
More to be done yet.
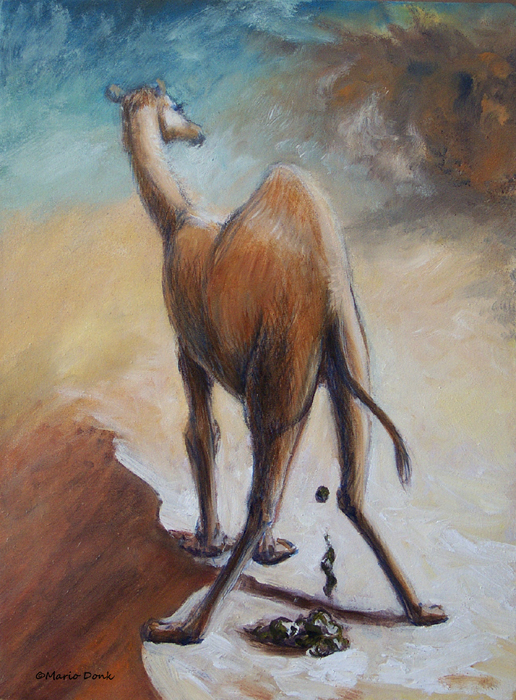
stage 8
Here is the final version. This is where I want it to be, not overly polished as that would only kill it. I am pleased with the result, the original still needs to be signed as the sig here is digital.
It’s basically minimal work from the last stage. Some work on the droppings as they are important, but I don’t need them finished to a high degree as I don’t really want that to be the center of interest. I think it’s in-your-face anyway. There’s enough detail, and some working of a dark brown, though not as thick as I mentioned before as it didn’t need it.
Note that I also removed excessive paint marks in the white sand as the idea is 2D and in this work, high paint edges only destroy the 2D illusion, or to put it another way, it’s a 2D surface with the illusion of 3D. Adding thick 3D paint will enforce neither effect but it would be a distraction, so I reduced it.
Also, there’s just a very little extra work done to the dust cloud and that’s it. The original is also for sale, contact me.